
First confirm the file to import is a CSV file, if not convert using: https://cloudconvert.com/xlsx-to-csv
The Import utilities will take a delimited file. If the first row has column headings it makes it easier to map.
Run the import utilities which is a separate executable, and take a look. The program will prompt for an input file that you select the table you will be importing. Finally one or more screens pop up to map the input file to the IMRCHNT fields. You can also set defaults for fields that are missing.
One important quirk – make sure you tab through all the tab pages.
The drop down combos do not initialize properly if you do not.
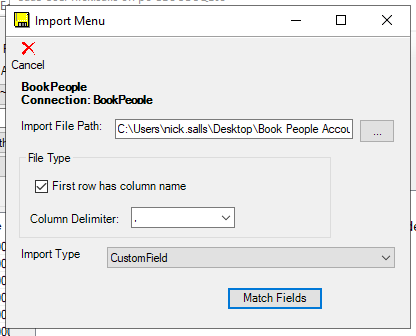
1. Pick the path to the file
2. Select the IMPORT TYPE
For GL Codes use: CUSTOMFIELD
The File Type and Delimiter defaults are usually okay, then click MATCH FIELDS
Use the screen below to match the columns in your CSV file to columns in your data.
For the CUSTOM FIELD row - make sure - FIELD IN FILE says 'USE DEFAULT ONLY' and you select the default type of customfield you want to associate these records with. For GL Codes use 'Acct_GeneralLedger'
Then match the CODE and DESCRIPTION columns to columns in your CSV file.

Click APPLY in the top left to run the import utility. You will receive a message to display a log of what happened on the import to confirm all worked or if there are any errors.
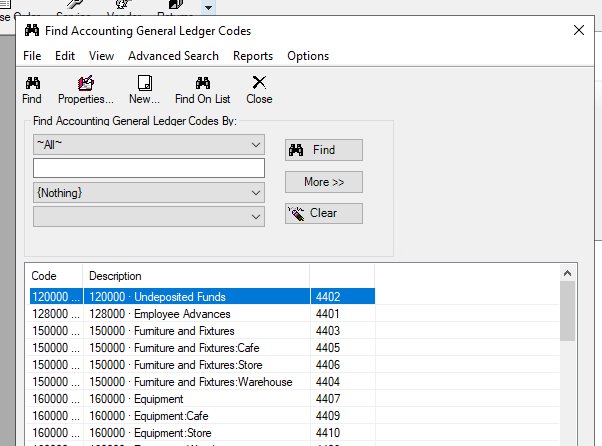
Below is the final product with the new rows in your GL Code parameter list.
On Standalone servers, you can double click on the IMPORTUTILITIES exe in the IMERCHANT folder to start the import utilities. If you are on a SAAS installation, you will need to add your db=yourcompany to the command to run the import utilities.
When you run the Utility, you will see the menu appear asking for some defaults: